All you need to know about symbolic links in Windows 10 -
In Windows 10, you can use symbolic links to easily redirect a folder to another location. Symbolic links are widely used in the operating system for its own files and folders. Using symbolic links, you can save your disk space and make your data available from various file system locations without moving your data physically.
Symbolic links can be quite useful in many situations. For example, recently I added a SSD in my computer and install Windows there. All my portable applications remained in the D: cell and many of them have been configured to work with the D: documents. The problem was that before I added this new SSD, the path to the folder is C: portable and C :. Documents
For these two cases a symbolic link that I had all this work in seconds. I created symlinks c: notebooks and c: documents without moving a file or a folder. Another interesting thing is that if I move my symbolic links to another location, for example, drive E :, they continue to work and will point to my files on D :. Player
This is how symbolic links can be created.
For the management of the symbolic link, Windows offers many ways.
The most famous tool is mklink. It has the following syntax (mklink /?)
MKLINK [[/D] | [/H] | [/J]] Link Target
/ D - Creates a symbolic link directory. Default is a file symbolic link
/ H -. Creates a hard link instead of a symbolic link
/ J -. Creates a Junction
Link directory - .. Specifies the new symbolic link name of
Target - Specifies the path (relative or absolute) that the new link refers to
Now you may ask be what is the difference between a symbolic link directory and a directory junction
.. what is the difference between a symbolic link directory and a directory junction
a Junction directory is an older type of symbolic link that does not support the UNC (network paths that begin with \) and relative paths. Directory junctions are supported in Windows 00 and Windows NT-based systems later. A symbolic link directory on the other hand also supports UNC and relative paths. However, they need at least Windows Vista. Thus, in most cases today, the directory the symbolic link is the preferred option.
What is the difference between a hard link and a symbolic link
A link can be created only for files, not folders. You can not create a hard link directories. So it has more limitations than a Junction directory and also does not support UNC paths.
How to see if a file or folder is a symbolic link
We will create three types of symbolic links and see how they will be displayed in the operating system.
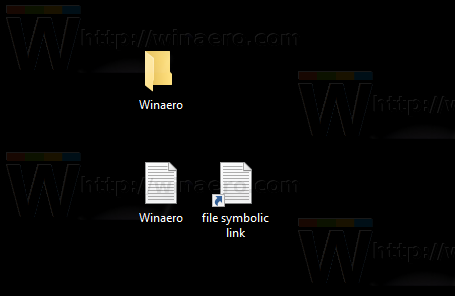
I will create the Winaero folder on my desktop and Winaero.txt text file in the same location.
Then I'll create a new symbolic link and a new Junction directory for the file and the text file.
mklink the command requires administrator privileges, so you need to run it from an elevated command prompt.
the following command to create a new directory symbolic link
mklink / d "c: users winaero desktop directory symbolic link " "c: users winaero desktop winaero "
 A symbolic link directory can be visually identified by the shortcut icon overlay added to its main icon:
again, when you have enabled the "Attributes" column in the detail view of the file Browser, you will see the "l" attribute indicating that it is a symbolic link. 
Now let's create a new junction directory for Winaero folder, as follows:
mklink / d "c: users winaero desktop directory junction "" c: users winaero desktop winaero "
 it has no visual difference from a directory symbolic link in Explorer files, so you can not tell if it is a directory or symbolic link directory junction
the only way to find the link type is to use the command console dir . Open a new command prompt window to the folder that contains your link and run the dir command. See the output: 
Now we will create a symbolic link to the text file I created. The command is as follows:
mklink "c: users winaero desktop symbolic link.txt file" "c: users winaero desktop winaero.txt"
 again, it is visually different from a regular shortcut file, besides the value of the attributes of the column and the "symlink" Type:

the situation is different for hard links . We will create a
mklink / h "c: users winaero desktop link.txt disk file" "c: users winaero desktop winaero.txt"
 hard link is no visual difference from a regular file when displayed in file Explorer:

the only way to ensure that the file is a hard link is to use another console utility. fsutil
Run as
fsutil hardlink list "link.txt disk file"
The specified command shows all files fixed link: 
you can not see if a file is a link easily because the Explorer of the box gives no indication. They behave like regular files in the production of a dir command or the File Explorer.
However, hard links are still links to other files. They do not reproduce the contents of the target file and do not take the redundant disk space
In Windows Vista and later, directory junctions are used to connect the paths of old files as folders C :. Documents and Settings for newer paths like C: Users. Symbolic links are also used to redirect C: Users All Users to C :. ProgramData
from Windows Vista, hard links are also widely used by Windows and its maintenance mechanism. Many system files are hard links to the files in the Windows folder store components. If you run the fsutil hardlink list command to explorer.exe, notepad.exe or regedit.exe, you can see for yourself!
 The record stores various files WinSxS system, which are linked by hard links files in the C: Windows, C: Windows System32 and other system files. When using the system updates are installed, the files in WinSxS interior is updated and difficult system-related sites again.
There. Now you know everything you need to know about symbolic links in Windows 10. Using this information, you can solve problems with the roads when you add a new drive in your computer, or move a file, but still need it is accessible via its previous path. Feel free to leave a comment if you have a question or something to add.
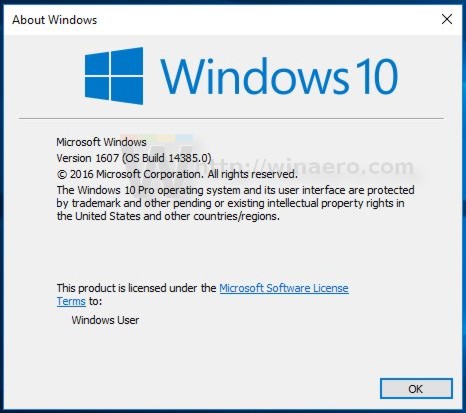 At the time of this writing, windows 10 build 14385 was released for fast Insiders Ring only. You can build the ISO images yourself in minutes.


 KB3172985 includes a number of improvements and security fixes. KB3172985 comes with the changelog follows:
  At the time of this writing, windows 10 build 1430 was released for fast Insiders Ring only. You can build the ISO images yourself in minutes.
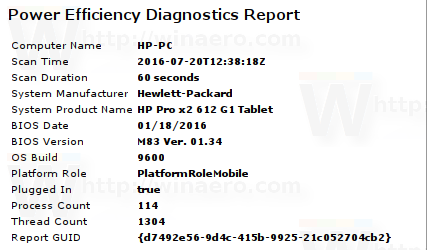
 the red color indicates the system parameters that have a significant impact on your power consumption of the battery. the powercfg tool adds these settings it finds Misconfigured in your diet plan to the errors section. It can find errors with your same configuration for applicable settings when your device mobile is connected. These are not errors per se, they are just indicated to inform you that these parameters can be futher optimized to consume less power or battery.
  As above, it is not necessary to correct them, because if you need to run your PC with these settings, you can continue using it in this way. However, if you want to minimize the energy consumption, it shows you what optimizations can be made to consume less energy.
  It contains general information about your power policy and plans, the battery information (similar to the ratio of the battery), supported sleep states, the power management capabilities of your processor and device driver analysis.


 Win + Tab - activate the Task View
  Win + G -. Bar start Game
  Win + S - Open Cortana and search
  Win + I - Open the Settings application. View all possible ways to open it HERE. Also, see how to open multiple pages settings directly in Windows 10 anniversary update.
  Win + A to open the Action Center.
  Win + K -. Open
  Win + Alt + D -. Open flyout data and time