All ways to change the user password in Windows 10

12.55 Add Comment
All ways to change the user password in Windows 10 -

There are several ways to define a new password for your user account on your Windows PC. I share all so the next time you need to change your password (or set a new password for another user account) you can choose the quickest and most convenient way to yourself.

Here are the different ways you can change your Windows password:

security screen Ctrl + Alt + Del

This method allows you set the password to the user currently logged user you to know. To change your password using this method, do the following:

  1. Press Ctrl + Alt + Del simultaneously keys on your keyboard to get the security screen. CAD screen in Windows 10
  2. Click "Change password"
  3. Specify the new password for your user account :. windows 10 change password

Settings app

In Windows 10, Microsoft offers many options related to user accounts within the Settings application. To set a password for your account using the Settings application, you must perform the following steps:

    1. Launch the Settings application. Windows 10 settings app build 10049
    2. Click on "Accounts".
    3. Click "Connecting options" on the left. Windows 10 change password settings app
    4. Here you can change various sign of options including password and PIN

Control Panel

The classic Control panel allows you to manage passwords for all user accounts on your PC

      1. Open the following Control panel page :.
         Control Panel  User Accounts and Family Safety  User Accounts  Manage Accounts 

        It is as follows: user accounts control panel Windows 10

      2. Click the account of user whose password you need to change
      3. Click on the "change password" :. control panel windows 10 chnage the password

Computer Management

This method is very old and works in all versions of Windows, from Windows 00 to Windows 10. Using snap computer management, you can set a new password for a Windows account.

      1. Open File Explorer and right click on the icon "This PC".
      2. select "Manage" from the context menu. windows 10 manage computer context menu
      3. Computer Management, select "Local Users and Groups" in the left pane. local users and groups
      4. In the right pane, double-click the folder "Users".
      5. The user list will be open. Right-click the desired user account and set the password in the context menu: windows 10 set password from computer management

Command Prompt / net.exe

the last method to set a new password for the user account uses a high fast control

      1. Open an elevated command prompt
      2. Enter the following command: ..
         net user user_name password 

        Replace "user_name" and "password" with the desired values. The password you specified will be set immediately without prompt

      3. Alternatively you can use the following command :.
         net user User_name * 

        This will ask interactively for a new password for the "user_name" account

      4. If you have a computer joined to the domain, use the following command :.
         net user user_name * / DOMAIN 

        This will ask interactively for a new password for the account "User_name" on the specified domain.

There. Now you know all the possible ways change the password for a user account in Windows 10 . Please let me know if I missed anything.

Download Trash icon from Windows 10 build 10056

21.54 Add Comment
Download Trash icon from Windows 10 build 10056 -

Thanks to Windows 10 build 10056 is leaking, we could get our hands on it and playing with it for a while to find a part of the changes and new features. One of the most exciting changes and the most anticipated for many users is the Trash icon. Interested users can download the Trash icon from Windows 10 build 10056 and use it in their current version of Windows. Here you go

To apply the Trash icon for your version of Windows, you must do the following :.

  1. Right-click an empty area of ​​the desktop and select "Customize" from the context menu: Personalize
  2. the Customize window is open, click "Change desktop icons "link on the left: personalize window
  3. in" Settings of the desktop icon ", modify the two Trash icons to those you can download using the link below. windows 10 recycle bin 10056 icon

There.

Download Windows 10 build 10056 Trash icon

You're done. Now your Windows has the last icon of the trash created by Microsoft.

Windows 10 build 10061 is out

18.53 Add Comment
Windows 10 build 10061 is out -

Microsoft has released a new official version Windows insiders. Windows 10 build 10061 is available for download now. Here are the download instructions and a brief change log that will give you an idea of ​​what's new in Windows 10 build 10061.

As usual, Microsoft has pushed the latest version via Windows Update service so that users who are interested in improving their windows 10 existing installations must perform the following steps :.

  1. Open the application settings
  2. Jump to update and recovery -> Windows Update Settings app check now
  3. Click
  4. Download build 10061.
  5. If you can not see the building upgrade option Check now button . Windows 10, click the Advanced Options link and switch built preview how it is installed. You must define the Rapid Ring fast ring

What's new in Windows 10 build 10061

  • New Mail and Calendar applications: These new applications provide improved performance and a three-pane email UI familiar with a toggle to move quickly between your email and calendar. Mail includes customizable Swipe Gestures, allowing you to slide right or left to take measures such as delete, flag, move, or mark as read / unread. Also check out the new experience of creating email. Mail leverages the familiar and rich capability of Word that allows you to easily insert tables, add images and use bullets and color to your text. The two new Mail and Calendar Apps Office 365, Exchange, Outlook.com, Gmail, IMAP, POP and other popular stories
  • Start improvements, Taskbar and Action Center. This release introduces the new theme of the black system in the Start menu, taskbar, and Action Center. The Start menu and taskbar now have transparency and you can also resize the Start menu. Microsoft has also enabled support for AUTOCOLOR that pulls the primary color of your wallpaper. In the Application settings under Preferences, you can adjust the color of Start, Taskbar, and Action Centre and transparency. Check the settings and tell us what you think. And based on feedback, Microsoft has been able to move the power button down left to the upper right of the Start menu to make it more accessible
  • Continuum improvements :. The taskbar is now optimized for tablets. Passage in Tablet mode causes the Start button, Cortana, and the task buttons See all grow in size and space to be touchable. Articles in the notification area also extend to improving untouchability. In addition, pinned and running applications are eliminated by default to reduce clutter and simplify the experience. Start and Task View are available for launching and switching. If you prefer still see applications on the taskbar, there is an option under Mode Tablet in the settings to enable them. Windows 10 now offers a parameter to start directly in Tablet mode. For tablets of less than 10 inches is the default
  • Task See enhancements :. Microsoft has made several visual updates to view tasks and they also refined the icons of the window, close buttons, and stickers. These improvements also apply to Alt + Tab and Snap Assist. View task gets a new icon on the taskbar too
  • Virtual Desktop improvements :. You can create as many virtual desktops as you like! When you hit the edge of your screen, a new infinity of experience now allows you to access any of your workstations.

(via Neowin ).

Download Windows images ISO 10122 10

21.50 Add Comment
Download Windows images ISO 10122 10 -

For those who need to perform a clean installation of Windows 10 build 10122, the ISO image is preferred method of configuration. While the official images of the ISO are available for download from this version, you can download custom made ISO files. These files were created using the Windows Update files (files * .esd) to build 10122. The configuration files are authentic and unaltered. Nothing has been modified or changed, so it's as official ISO images from Microsoft.

Windows 10 banner logo devs 04 You can use these ISO files to perform a clean install of Windows 10 build 10122 from scratch on a real PC or a virtual machine like VirtualBox.

Download ISO Windows 10 10122 build (x64)

MD5: fae1d4f613354f16c21e5c159e2f322d

Download ISO Windows 10 build 10122 (x86)

MD5: a5f6970f52d31c3aaba9cf17a58d4af3

Note: the above files created by third parties. Winaero is not related to the files you download. Do it at your own risk, these connections may stop working at any time.

Windows 10 build 10102 comes with new tile animations and updated Cortana

15.52 Add Comment
Windows 10 build 10102 comes with new tile animations and updated Cortana -

Some new screenshots of Windows 10 build 10102 fled the internet. Images leak, we can see Cortana updated application that has tight integration with the taskbar. In addition, new animations for Live Tiles on the Start menu are identified in the leak of screenshots. Let's see these changes in detail

This is how the settings pane updated Cortana like :.
20150428_145446_378
This panel appears when the user clicks on the icon in Cortana Hamburger menu. Here are some screenshots of the updated application Cortana:
20150428_145452_495
20150428_145457_186
The most interesting thing is a new animation of the cube Live Tiles for modern applications pinned to Start menu in Windows 10 build 10102. rather than slide up to show updated information on the tile, he now returns with a more 3D effect.
68f62d9btw1erlcy46kjqg20fo00kc4
it is interesting to see how Microsoft goes to 1010x directly build numbers. Probably they are closer to RTM. Maybe we can expect full functionality or Release Preview (RC) build available for Windows Insiders in the near future. (Via Neowin )

Recent builds of Windows 10 based on changes IU

12.51 Add Comment
Recent builds of Windows 10 based on changes IU

- Several images of Windows 10 build 10108 were spotted on the Internet. Images leak, we see changes that occur in the user interface in Windows 10. Let's see what has changed in this version.

The first change you will notice is the new context menu style. They have more space between the elements making them more touch-friendly. Also the color popup menus background is white now, not gray. In built earlier, the same menu has been implemented, but only to the taskbar. Now, context menus across the entire operating system have the same blank look.
windows 10 build 10108 context menus
The second change is a new appearance toggle switches in the Settings application. Now they respect the color of the current theme. windows 10 build 10108 toggles

Microsoft changed the appearance of the toggle switch commands because of negative comments from Windows insiders.

Windows 10 build 10108 also comes with a new application "Get Started" which is designed to guide novice users through the basics of Windows 10. It includes several training videos. I noticed that the title bar of this application is dark, which is different from the gray title bar universal applications in public Windows 10 built

windows 10 build 10108 get started

The application Music now shows a change log after the update. This is a useful addition - to see what has changed in applications. Each universal application may not follow it and can not display a change log:

windows 10 build 10108 change log 
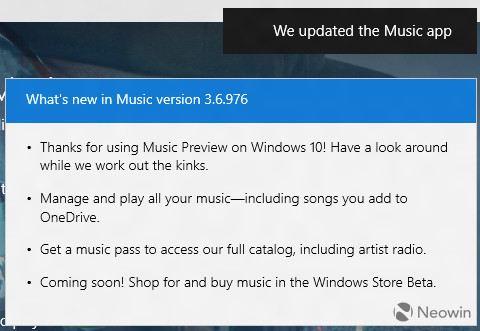
And finally, the dark theme is now present for all sorts of notifications and panels in this version of Windows 10 . for example, here is how the menu looks Network in Windows 10 build 10108:

windows 10 build 10108 network flyout

during the installation process, when Windows completes the final steps, the process Installation used to rotate through different colors, but in this version, the screen is blue all the time. It is quite possible that Microsoft removed the color cycle of the Out-of-Box-Experience Stage in Windows 10. Personally, I loved him.

What is your opinion about these changes? Do you or do you not trivial these changes important to the overall user experience? (Via Neowin ).

How to take ownership and get full access to the files and folders in Windows 10

18.49 Add Comment
How to take ownership and get full access to the files and folders in Windows 10 -

Sometimes you need to get full access to a file or folder in Windows 10 . It can be a system file or folder, or one that was created by a user account that no longer exists. In most cases, the Windows operating system you from doing any work on those files and folders. In this article we will see how to take ownership and get full access to the files and folders in Windows 10.

Take ownership of a file or folder in Windows 10 using file Explorer

to take ownership of a file or folder in Windows 10 without using third-party tools

  1. Open file Explorer, and then locate the file or the folder you want to take ownership of.
  2. Right-click the file or folder, click Properties, then click the Security tab.
    Windows 10 take ownership 1
    Windows 10 take ownership 2
  3. Click on the Advanced button. The "Advanced Security Settings window" appears. Here, you must change the owner of the key
    Click the Change link next to the "owner" tag ..
    Windows 10 take ownership 3
  4. The Select user or Group window will appear
    Windows 10 take ownership 5
    Select the user account using the Advanced button or simply type your user account in the box that says "Enter the object name to select and click OK.
  5. Optionally, to change the owner all the subfolders and files in the folder, select the check box "Replace owner on subcontainers and objects" in the "Settings advanced security. "Click OK to change the ownership. Windows 10 take ownership 6 owner subcontainers
  6. Now you must provide full access to the file or folder to your account. right-click the file or folder again, click Properties, then click the Security tab.
  7. Click the Add button. The "Permission Entry" window appears on the screen: Windows 10 take ownership 7 permission for entry
  8. Click "Select a primary" and select your account: Windows 10 take ownership 8 select principal
  9. Set permissions for "Control total ".
    Windows 10 take ownership 9 full control
    click OK
  10. option, click" Replace all existing inheritable permissions on all descendants with inheritable permissions from this object "in the window" advanced security settings. "
    Windows 10 take ownership 10 full access
    what this means is permissions on this parent object will replace those on its descendant objects. When cleared, permissions on each object, whether parent or its descendant, can be unique. Click OK to get full access to the file or folder.

There. You just changed ownership and gained full access to the file in Windows 10 using the application file Explorer

See :. How to restore the property TrustedInstaller in Windows 10

Take ownership of a file or folder in Windows 10 using TakeOwnershipEx

Alternatively, you can save a lot of your time using my freeware, TakeOwnershipEx. It allows you to change file ownership and access rights with a single click. Just select the file or folder and click the "Take Ownership" button:
Windows 10 take ownership 11 toex Windows 10 take ownership 12 toex
Once you get full access to the file or folder, you can even restore the default permissions which he had. Click the "Restore property" button to restore:
Windows 10 take ownership 12 restore toex
There. Using TakeOwnershipEx application, you can save your time, but even if you prefer to use the embedded options in the File Explorer, it should not be too difficult for you if you followed the instructions in this article.

How to navigate applications by alphabet in Windows 10 Start menu

15.48 Add Comment
How to navigate applications by alphabet in Windows 10 Start menu -

with Windows 10 build 10130, Microsoft has released a new way to browse installed applications. Many users who have installed the release of Windows 10 build 10130 and saw the screenshots we posted are curious how to activate the alphabetic browse in Windows 10 Start menu. . In this article we will show how it can be done

To navigate applications alphabetically in the Windows 10 Start menu , do the following:

  1. Open the Start menu. See our excellent article :. How to click the Start button
  2. Click the item "All Applications" at the bottom left of the Start menu. click all apps
  3. Click on the empty space next to a letter: Windows 10 click near the group header The Start menu displays the user interface with navigation of the alphabet: windows 10 alphabet navigation start menu

This letter alphabetical grid minimizes scrolling list of apps for the mouse and touch screen devices. Of course, the user must know the letter at the beginning of this application it wants to start, then press or click it. Nevertheless, it is an interesting way to minimize the vertical scrolling of a long list of applications. Do you like the new way to navigate all the applications? Let us know in the comments.

Release Notes for Windows 10 build 10135 fled to the Internet

12.47 Add Comment
Release Notes for Windows 10 build 10135 fled to the Internet -

Windows 10 build 10135 is a new building that is supposed to be released for quick ring in the near future . Today, wzór disclosed its release notes, known issues, and all that is usually related to new construction. Read on if you are interested.

Windows 10 banner logo nodevs 03 253340_original 253647_original 253697_original 254179_original 254286_original 254707_original 25406_original 255039_original

Here. (Via wzór )

How to disable the Web search in the Windows taskbar 10

21.46 Add Comment
How to disable the Web search in the Windows taskbar 10 -

from Windows 10 comes with a new feature called "Cortana". There is a digital assistant that is integrated with Windows 10. Windows 10 has a search box in the taskbar, which can be used to launch Cortana and search by keyboard or by voice. Once you type something in the search box on Windows 10 taskbar, the research results show, but the search results on the Web are mixed with local search results, store applications and content Bing. If you want to disable Internet and store search applications running on the taskbar, here's how to disable
Update # 2 :. In October 07 the Windows version to disable Web Search option and Cortana was removed again

You can turn quickly tweak the following registry key:

 Windows Registry Editor Version 5.00 [HKEY_LOCAL_MACHINESOFTWAREPoliciesMicrosoftWindowsWindows Search] "AllowCortana" = dword: 00000000 "DisableWebSearch" = dword: 00000001 

This is

update # 1 : Windows Version 10 1511, there is an option Cortana in the preferences, allowing you to disable. Search the web in the taskbar

To disable it, do the following:

  1. Click on the search box in the taskbar. The Cortana pane appears on the screen: Cortana pane
  2. Click the gear icon to open its settings: Cortana settings
  3. Disable the "Search online and include web results "as the above shows.

There. This Web search allows you to disable Windows 10 taskbar :.

Windows 10 web search disabled

The alternative route using Group Policy is described below

To disable Bing search and stores applications to appear in search results in Windows 10 taskbar, you must do the following:

  1. Press Win + R shortcut keys and on the keyboard to open the Run dialog box. In the Run dialog box, type the following:
     gpedit.msc 

    windows 10 gpedit

  2. Go to the following path:
     Computer Settings-> Administrative Templates-> Windows Components-> search 
  3. Enable the following group policies:
    • not to allow the web search
    • not search the web or web results display Search

windows 10 disable web search in taskbar windows 10 disable internet search in taskbar

once you've done that, you must restart your PC. After the restart, the search engine in the taskbar will be limited to only local results: windows 10 local search in taskbar

The search will not work without delays and much faster than before. The research component will also open instantly. A side effect of this change is that Cortana stopped working:

windows 10 cortana disabled I personally used Cortana, so for me it is not a problem
This is

..

Windows 10 build 14295 earned a cumulative update, the OS version is now 14295.1004

18.45 Add Comment
Windows 10 build 14295 earned a cumulative update, the OS version is now 14295.1004 -

A new cumulative update for Windows Insiders PC running Windows 10 build 14295 has been freed. Build 14295 represents the slow ring. The released update, which is KB3154879, brings "improvements to enhance the functionality of Windows 10 Insider Preview", which Microsoft describes.

Screenshot-6
Windows 10 build 14295 was released on March 25, 2016. Later, in April, it became available for insiders ring slow through Windows Update. Official ISO images were also released.

Since then, there has been no new construction to slow the Ring. Insiders Ring Quick got a new building, 14316.

The published KB3154879 comes with no details on what exactly has been fixed or improved. The short statement mentioned at the beginning of the article is known about this update

If KB3154879 does not come automatically to your PC, it can be downloaded using the settings> Update day and security. -> Check for updates. Alternatively, you can use these offline download links provided below.

KB3154879 offline download links
If you need to install KB3154879 on multiple PCs after downloading it once and you want to save your bandwidth or have another reason to download this update package, here are the links for you:

  • KB3154879 for Windows 10 build 14295 32-bit (x86)
  • KB3154879 for Windows 10 build 14295 64-bit

Windows 7 Games for Windows Update 10 and above birthday

15.44 Add Comment
Windows 7 Games for Windows Update 10 and above birthday -

If you are a Windows started, you might already be knowing that Windows Update 10 anniversary, formerly known as the Windows 10 update Redstone broke the classic Windows 7 games. They no longer work. Here is a Windows 7 Games package update that fixes this problem.

To Download Windows 7 work games in Windows 10 Update anniversary , follow the instructions below.

  1. Get the ZIP archive games from the following link: Download Windows 7 games for Windows 10, Windows 8 and Windows 8.1
  2. Unzip and run file [ Windows 7 games for Windows 10 and 8.exe . Windows 7 Games for Windows 10 anniversary update
  3. Follow the installation wizard and select the desired game that you want in Windows 10. Windows 10 Select games to install

You are done! Go to the Start menu and play your favorite games now. Windows 10 games from Windows 7 in Start menu

This package Windows 7 Games is compatible with all versions of Windows 10, Windows 8.1 and Windows 8 . Windows 10 build 14328 games

The package installs games in the language of your operating system. The following games are available:

Solitaire
Spider Solitaire
Minesweeper
FreeCell
Hearts
Chess Titans
Mahjong Titans
Purble Place
Spades Internet
Internet Checkers
Internet Backgammon

and of course the shortcuts to them in Games Explorer

Windows 10 game explorer with games from 7
action games in Windows 10 builds 14328:

Enjoy

.

Download the MUI Language Pack for Windows 10 build 14342 - direct links

21.42 Add Comment
Download the MUI Language Pack for Windows 10 build 14342 - direct links -

Microsoft has made to Windows 10 build 14342. Insiders Windows that are on the fast Ring are getting it. As always, I share a set of direct links to Mui files (x86 and x64) for this construction. mui langpack globe logo banner

MUI language packs download is useful for users who need to install them on multiple PCs. They save their Internet bandwidth and time by not download them again on each PC. Instead, they can save the package offline and use it for future installations. Tip: how to install a language MUI CAB file in Windows 10.

Language / Locale Direct download link

Windows 10 build 14342 32-bit MUI / LPs

ar-SA download Link
ca-ES download Link
cs-CZ download Link
da-DK download Link
de dE download Link
en-fR download Link
en-US download Link
es-ES download link
es-MX download link
eu-ES download Link
fi-fI download Link
en-US download Link
fr-FR download Link
gl-ES download Link
hi-iN download Link
id-ID download Link
it-IT download Link
ja-JP download Link
ko-KR download Link
nb-NO download Link
nl-NL download Link
pl-PL download Link
pt-BR download Link
ru -RU download Link
sv-SE download link
e-tH The download link
tr-TR download link
vi-VN download Link
zh-CN download Link
zh-TW download link
Language / Locale direct download link

Windows 10 build 14342 64-bit MUI / LPs

ar-SA download Link
ca-ES download Link
cs -CZ download Link
da-DK download Link
de-dE download Link
en -F download Link
en-US download Link
es -ES download link
es-MX download link
eu-ES download Link
fi-fI download Link
en-US download Link
fr-FR download Link
gl-ES download Link
hi-iN download Link
id-ID download Link
it-IT download Link
ja-JP download Link
ko-KR download Link
nb-NO download Link
nl-NL download Link
pl-PL download Link
pt-BR download Link
ru-RU download Link
sv-SE download Link
e-tH download Link
tr-TR download Link
vi-VN Download link
zh-CN Download Link
zh-TW download Link

have a question? Just ask in the comments.

How to disable or enable Windows Defender notifications improved in Windows 10

18.41 Add Comment
How to disable or enable Windows Defender notifications improved in Windows 10 -

for Windows 10 update notifications birthday introduces enhanced for Windows Defender. Now, when the analysis is complete, the application displays a toast notification on the desktop and puts the same notification to the Action Centre. There is a parameter for handling notifications improved in Windows 10. Using it, you can disable or enable.

Windows 10 Defender enhanced notification
With Windows Update 10 anniversary, which is represented by build 14342 of this writing, Microsoft has an option in the Settings application that handles notifications improved Windows Defender . To access it, you must do the following.

  1. Open Settings. Windows 10 settings
  2. Jump to update and Security - Windows Defender. Windows 10 update and security Windows 10 setting defender
  3. There, scroll down to improved notifications :. Windows 10 setting defender notifications
  4. Flip the appropriate switch to enable or disable this feature
  5. [

This is pretty simple

in case you need to activate or disable Windows Defender notifications improved in Windows 10 using a registry tweak, the value of the appropriate register is here:

 HKEY_LOCAL_MACHINE  SOFTWARE  Microsoft  Windows Defender  Reporting 

once you open this location (see how to jump to the desired key registry in one click), you can see the value DisableEnhancedNotifications . This is a 32-bit DWORD value.
Windows 10 defender disable enhanced notifications
If it does not exist in your registry, you can simply create it. You will need to take possession of this key,

The value of DisableEnhancedNotifications may be 1 or 0:

  • 0 means notifications upgraded to Windows Defender is enabled (default ).
  • 1 means improved notifications for Windows Defender are disabled.

There.

Warning: KB3150513 will install Windows 10 again for you

12.43 Add Comment
Warning: KB3150513 will install Windows 10 again for you -

Microsoft continues its aggressive push to install Windows 10 on Windows 8 and Windows 7 PC. Another series of updates started - a new update, KB3150513, was released to "help" the user to change Windows 10 immediately

The patch comes with the following description:

This update provides updated configuration and definitions for diagnosing compatibility performed on the system. The updated definitions will improve accuracy and help enable Microsoft and its partners provide compatibility for customers who want to install the latest Windows operating system. This update will be offered only if KB2977759, KB2952664, KB2976978 or is installed on Windows 8.1, Windows 8, Windows 7 Service Pack 1 (SP1) or Windows 7 RTM.

Microsoft avoids the string "Windows 10" in the text, so that the average user will not receive any idea what the update does.

It seems that the Redmond giant will not stop until July 2016, after which the supply of free update will end. extremely aggressive push society to Windows 10 became very famous. No other version of Windows history was pushed by them with so much despair.

If you're not familiar with the whole saga of dynamic updates, the following links for you to see how desperate Microsoft Windows 10 is to force on you ..

  • windows 10 upgrade offers no Undo option now
  • of Windows 10 can be downloaded silently on your computer
  • It could point directly prompted to install it as it is aggressively pushed through updates deceptively described.
  • for Windows 10 will become a recommended update.
  • Microsoft continues to push aggressively for Windows 10.

As someone who has decided to stay with Windows 7, I uninstalled all updates telemetry and tracking and disabled Windows Update completely. I understand that disabling Windows Update is an extremely precarious solution, but better than having to deal with what I have made allow, hide, uninstall or disable tweak to prevent Windows 10 update forced.

because of my choice having led by Microsoft, I learned to do all my daily computing tasks in Linux, as much as possible. I switched to Arch Linux some time ago and I can say I am very happy with my decision.

If you have already installed KB3150513, here are instructions to get rid of him. Paste the following commands into Notepad, save the file as a batch file and run it from an elevated command prompt:

 wusa / uninstall / kb: 3150513 / quiet / norestart wusa / uninstall / kb: 2977759 / quiet / norestart wusa / uninstall / kb: 2952664 / quiet / norestart wusa / uninstall / kb :. 2976978 / quiet / norestart 

This is

Download Windows 10 build 14352 ISO images

15.40 Add Comment
Download Windows 10 build 14352 ISO images -

Windows 10 build 14352 has been released for quick ring insiders only. It is supposed to be installed by the Windows Update service. This means no official ISO images available. Here thirds ISO images that you can use to install Windows 10 build 14352 from scratch or in a virtual machine.

Windows 10 iso images banner 0
Twitter user "Lyraull" made a bunch of ISO images. You can find the links below Tweet

Here are some links from its ISO collection:

"English"
14352.1002.0522-1930.RS1_RELEASE_CLIENTEDUCATION_RET_X64FRE_EN-US.ISO (3.57 GB)
http://bit.ly/25pmj6u
14352.1002.0522-1930.RS1_RELEASE_CLIENTEDUCATION_RET_X86FRE_EN-US.ISO (2.64 GB)
http://bit.ly/1WZ5j2m

14352.1002.0522-1930.RS1_RELEASE_CLIENTPRO_OEMRET_X64FRE_EN-US.ISO (3.68 GB)
http://bit.ly/1U9YB2z
14352.1002.0522 - 1930.RS1_RELEASE_CLIENTPRO_OEMRET_X86FRE_EN-US.ISO (2.75 GB)
http://bit.ly/1NRlOtZ

14352.1002.0522-1930.RS1_RELEASE_CLIENTENTERPRISE_VOL_X64FRE_EN-US.ISO ( 3, 57 GB)
http://bit.ly/1Vl7NpW

(basic)
14352.1002.0522-1930.RS1_RELEASE_CLIENTCORE_OEMRET_X64FRE_EN-US.ISO (3, 67 GB)
http://bit.ly/1P2t0DQ
14352.1002.0522-1930.RS1_RELEASE_CLIENTCORE_OEMRET_X86FRE_EN-US.ISO (2.75 GB)
http: / / bit .ly / 25pqq2h

To date, all files are accessible
Tip :. you might be interested in reading the following article :. Generic key to install Windows 10 RTM

Windows 10 PC build 10586338 is for Release Preview ring

12.39 Add Comment
Windows 10 PC build 10586338 is for Release Preview ring -

Microsoft released Windows 10 PC build 10,586,338 for participants of the Windows Insider program. If you have joined the Release Preview ring, the update will arrive to your PC very soon.

Devices Windows 10 update setup banner Like other cumulative updates, this version does not take adding new features to Windows 10. It is focused to address various bugs and improve performance and stability of the operating system. After it passes the ring test Release Preview, it should be available for all users of Windows 10, which is 10586 construction of the stable branch of Windows 10.

Change the default action when you start typing in Windows Explorer File 10

21.38 Add Comment
Change the default action when you start typing in Windows Explorer File 10 -

When you type something in the File Explorer in Windows 10, the element with default a name that starts with the letter or number you typed in the currently open folder or drive is selected. For example, if you browse to C: , you can press to go directly to Pro C: Program Files. You can customize this behavior in Windows 10. Thus, instead of the file is selected, a search is performed. File Explorer Windows 10 offers two choices that can change the behavior of the Explorer window after entering your keyboard. In this article we will see how to access and change these options.

To change the default action when you start typing in an Explorer window, use the Folder and Search Options. direct dialogue Explorer configuration files
Follow these simple steps:

  1. Open File Explorer. Windows 10 Open File Explorer
  2. Click File -> Change Folder and search options: Change folder and search options
  3. The Folder Options window opens, put there in the View tab . Folder and search options View tab
  4. Scroll the list of options until you find the item called When typing in the list view . when typing
  5. If you set this option to "Select the item typed into view" Explorer jump to the item in the folder whose name you entered in the open window.
    For example, see the results when I type "peak" in the next screenshot: typed pic
  6. If you set this option instead of "automatically Type in the search box" Explorer send your keyboard input to the search box in the title bar and start looking for what you have entered immediately. when typing do search
    For example, this is the result when this option is enabled: typed pic 2

See the following video:

Tip: you can Winaero subscribe on Youtube .

There. By default File Explorer uses the "Select the item typed into view." You can use the keyboard shortcut Ctrl + E to move the focus in the search area. The same can be done in Windows 8.

How to change the splash edge color in Windows 10

18.37 Add Comment
How to change the splash edge color in Windows 10 -

Edge is the new default browser in Windows 10. Microsoft is constantly working to make it better. However, some of its options are accessible only by editing the registry. In this article we will see how to customize the color of the Edge startup screen.

Microsoft board comes with a simplified user interface and does not allow you to customize it. Even the color of the boot screen, we will apply a registry tweak.

Change color Edge splash in Windows 10 , you must do the following.

  1. Open Registry Editor. Windows 10 run regedit
  2. Go to the following registry key:
     HKEY_CURRENT_USER  Software  Classes  Local SettingsSoftwareMicrosoftWindowsCurrentVersionAppModelSystemAppDataMicrosoft.MicrosoftEdge_8wekyb3d8bbweSplashScreenMicrosoft.MicrosoftEdge_8wekyb3d8bbwe!MicrosoftEdge

    edge registry key

  3. On the right you will see the string parameter named BackgroundColor . Its value is an HTML color code that you can change. The default is # 0078D7 , which represents the blue color default: edge splash default color edge registry key background color
  4. Change BackgroundColor value and put the color you like by entering a new HTML color code. Here are some color codes :.
    # FF0000 - red
    # 00FF00 - Green
    # 0000FF - blue
    # 000000 - black
    # FFFFFF - white
    You can use any application or online service to find the desired color code value. For example, my favorite editor "Geany" has a tool "Color Chooser" :.
    geany color chooser
    My favorite online service is HTML Color Picker by w3schools
    Once you get the code of the desired color, enter the value BackgroundColor: edge registry key new background color
  5. now, restart Edge. The result will be: edge splash customized color

There. With this simple tweak, you can set the Edge splash color to a color you like. Credits: WinHelpOnline
Watch this video to see this thing in action :.

Tip: You can Subscribe to Winaero on YouTube .

Install large applications on another disk with Windows Store in Windows 10

15.36 Add Comment
Install large applications on another disk with Windows Store in Windows 10 -

Another interesting feature is spotted in the next update of Windows 10 anniversary. The user will be able to select another drive to install large applications and save space on the hard drive of the system

The following screen capture shows this useful feature in action :. 2_untitled_story

Image credit :. Neowin

The option is available for larger applications and games. We do not know what the size of the application triggers exactly the opportunity to be shown, but smaller applications will continue to use the default location that is defined in Settings. It is possible that it depends on the free space you have on the device that is used to determine the default location of the application.

This is certainly an improvement for users who actively use store applications. It is a nice addition to the option to select the Store Settings application default installation location. See this article for future reference: Move applications to another drive or partition in Windows 10.

This new feature is known to work in construction 14366 and 14361.

Do you find this useful change? Tell us in the comments.

Find scheduled tasks that awaken your Windows 10 PC

12.35 Add Comment
Find scheduled tasks that awaken your Windows 10 PC -

If you put your Windows 10 PC to sleep, you might be surprised to find it in a working condition later. There are many reasons behind this. One of these reasons can be programmed tasks. Users often forget to make sure there are no scheduled tasks set to wake up the PC. There's see how easily solve this.

There is a single command, you can run to find all tasks that are set to wake your Windows 10 PC sleep. All you need is PowerShell

  1. Open PowerShell in Windows 10.
    windows 10 run powershell from search
  2. In PowerShell, type or paste the following command :.
     Get-ScheduledTask | where {$ _. settings.waketorun} 

Once done, all tasks that are able to wake up from Windows 10 will be listed in the output of the command.
On my Windows 10 PC, all these tasks are disabled: Windows 10 wake up tasks

On another PC running Windows 8.1, the following tasks are listed to wake up the PC: Windows 8.1 wake up tasks

If you find unnecessary tasks in this list, open the task Scheduler, and disable or double click it and uncheck "Enable the computer to run this task" to the Conditions tab. Then Windows should not wake the PC more run scheduled tasks.

There.